


Our templates section in the dashboard allows you to create and customize templates for your product images. You can assign these templates to different brands, making it easier for you to create images that are consistent with each brand’s visual identity.
Just follow this simple process:
Click the "Templates" Button
To begin, navigate to the templates section of our dashboard and locate the template you’d like to use. Hover over it, and click on the "Add/Remove from Brand" button.
Assign to Already Created Brand
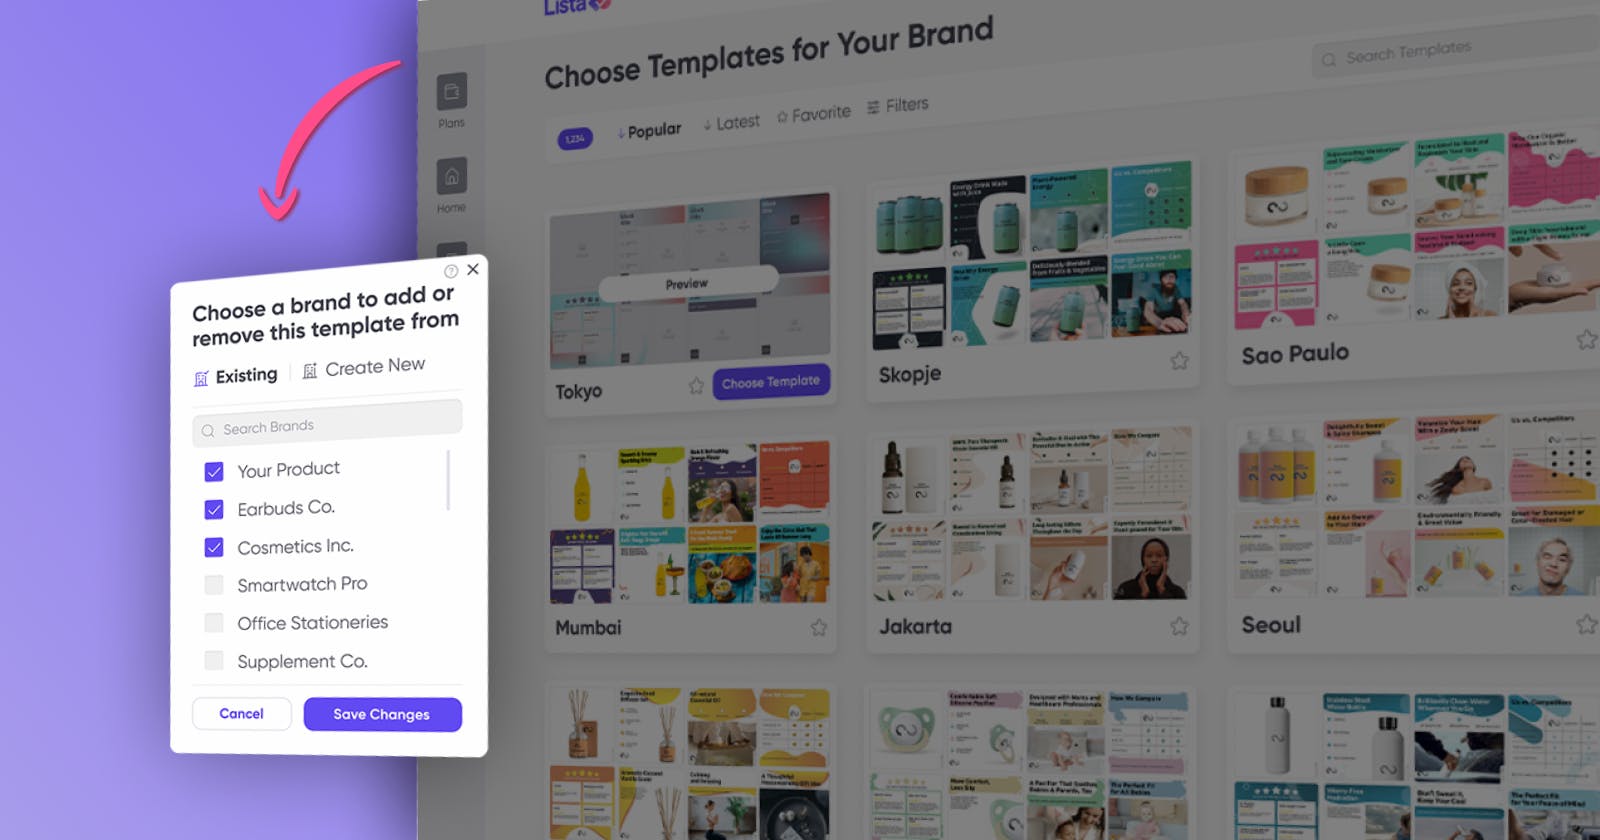
If you’ve already created the brand you’d like to assign this template to, simply find it below or use the search function.
Assign to a New Brand
if you haven’t created the brand, click on the "Create New" tab. You will be asked to provide a Brand Name and Logo. Once you’re done, click “Save Brand” and ensure that the new brand has been added to the list of existing brands and is ticked before saving the changes.
- Once you’ve assigned a template to a brand, it will be available to use when you’re creating product images for that brand.
Locate the Template
When you go to the brand overview page, under the Templates tab, you will be able to locate the assigned template, and it will be available in the dropdown menu when you’re creating images for products under this brand.
And that's it!
Assigning templates to your brands makes it easier to create consistent and visually appealing product images that reflect your brand’s identity. With Lista, you can streamline your brand’s image creation process and ensure that your product images stand out to your customers. We hope this guide has helped show you how to assign templates to your brands using Lista.
You can also check our video tutorial here:
If you have any questions or need further assistance, please feel free to contact our support team or post your questions in our Lista Discord Community!